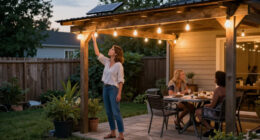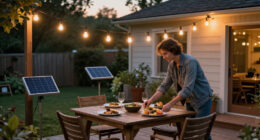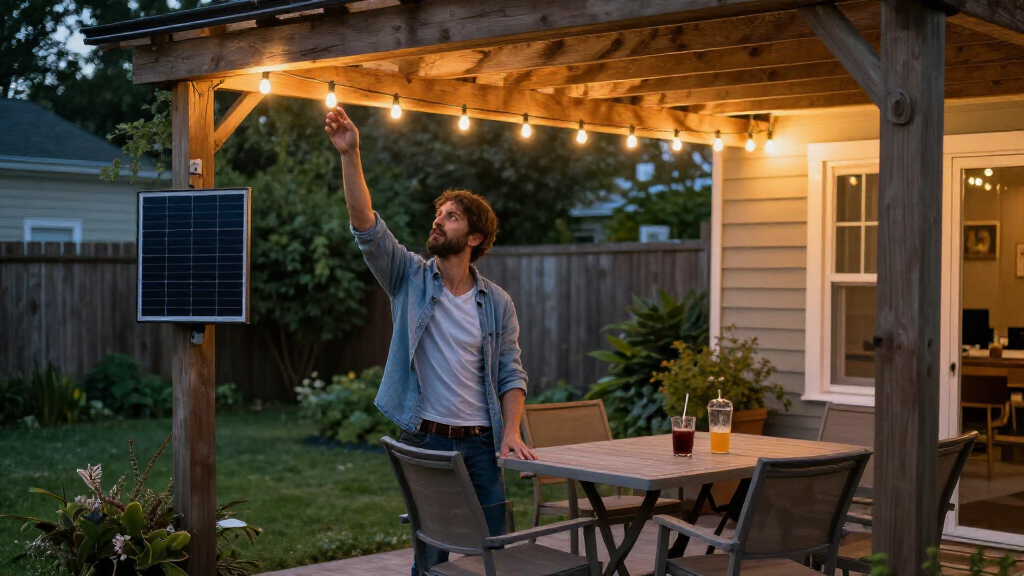

Install solar-powered outdoor string lights by choosing a sunny panel location, planning the light route, mounting the string securely, and testing it after charging. This guide is for beginners setting up lights on a patio, deck, balcony, fence, or garden area. Allow about 1-2 hours for installation, then give the panel a full sunny day or two to charge and check the lights after dark.

Get backup power and energy gear delivered free — and shop member deals
- Fast, free delivery on millions of items
- Access to Prime Big Deal Days deals on October 6–7
- Prime Video, Amazon Music and more included
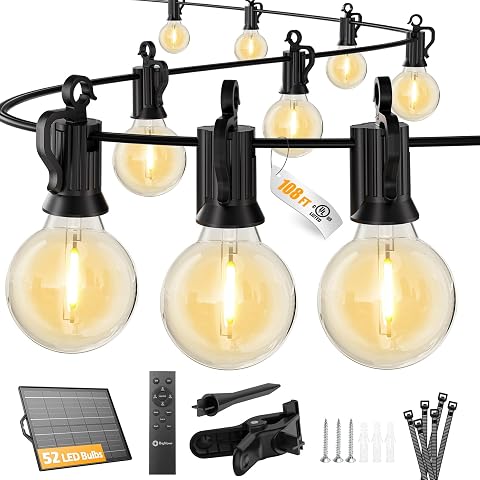
Brightown 108 ft Solar String Lights with Remote and USB Charging
- ✔ Length: 108 ft
- ✔ Bulbs: 50 G40 LED bulbs, plus 2 spares
- ✔ Bulb spacing: 2 ft

Brightown 100 ft Solar String Lights with 31+2 Shatterproof LED Bulbs
- ✔ Length: 100 ft
- ✔ Bulbs: 31 LED bulbs, plus 2 spares
- ✔ Light color: Warm white, 2700 K
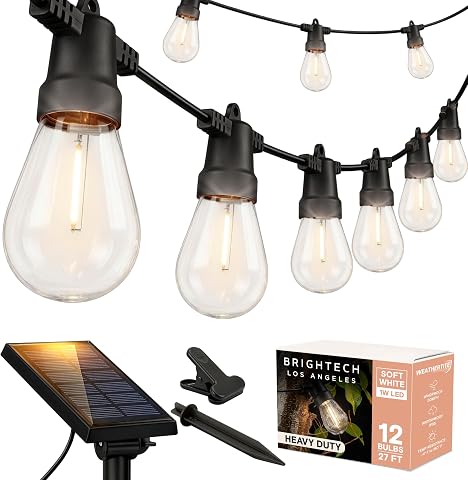
Brightech Ambience Pro Solar-Powered Outdoor String Lights, 27 ft, 12 Shatterproof LED Bulbs
- ✔ Length: 27 ft
- ✔ Bulbs: 12 shatterproof S14 LEDs
- ✔ Light color: Soft white, 3000 K
Difficulty: Beginner | Time: 1-2 hours, plus 1-2 sunny days for charging and testing
What You’ll Need
Tools & Materials:
- Solar string-light set with panel, mounting bracket, and stakes or hardware
- Tape measure
- Pencil or removable marker
- Outdoor-rated hooks, screw eyes, cable clips, or light-support wire as appropriate
- Drill and suitable bit if attaching hardware to wood or masonry
- Ladder rated for your weight and the working height
- Outdoor extension cable only if supplied or approved by the light manufacturer
Knowledge:
- Basic use of a tape measure and hand tools
- Ability to identify a suitable mounting surface
- Basic ladder safety
Check the package for the light string’s length, panel lead length, weather rating, mounting instructions, and charging requirements. Use hardware suited to the surface and outdoor conditions. Do not connect solar lights to household mains power. If using a ladder, place it on firm, level ground and have someone nearby; do not reach sideways from the ladder.
Brightown 108 ft Solar String Lights with Remote and USB Charging
For buyers who want one strand to cover a large patio, pergola, or fence line, this is the most versatile option in the group. Its 108-foot length and 50 warm-white bulbs, spaced two feet apart, create a longer lighting run than the 100-foot Brightown while keeping a substantial bulb count. That makes it the strongest fit when we need to span a wide area without moving to the more compact Brightech.Its strongest practical advantage is charging flexibility. The adjustable solar panel and USB-C charging let us rely on sunlight when conditions cooperate and use a wired top-up when they do not. The stated runtime is up to 36+ hours, notably longer than the 100-foot Brightown’s up-to-26-hour claim and far beyond Brightech’s 5–6 hours. Remote dimming, three modes, and a six- or eight-hour timer add useful control; we can lower brightness for a relaxed gathering rather than leaving the strand at full output.There are limits. The lights cannot connect to another strand, so the 108-foot run is the coverage ceiling rather than a building block for a larger installation. Solar charging still depends on sunlight, and buyers must plan where the panel will receive it. This is our top pick for broad coverage and flexible operation, but the 27-foot Brightech is easier to size for a small space, while the 100-foot Brightown may be enough if its shorter reach suits the layout.
Pros:
- 108-foot run with 50 bulbs and two spares
- Solar and USB-C charging provide two ways to replenish power
- Remote offers four brightness levels, three modes, and timer options
- IP65 rating and shatterproof bulbs suit outdoor installation
Cons:
- Cannot connect to additional strands for longer coverage
- Solar charging performance depends on available sunlight
Best for: Buyers lighting a large patio, pergola, or outdoor dining area who want remote dimming and USB-C charging as a backup.
Not ideal for: Anyone who needs connectable strands, has only a small balcony, or cannot place the solar panel where it can collect sunlight.
Bottom line: We recommend this as the most capable all-around choice when its long, non-connectable run fits the space.
“We recommend this as the most capable all-around choice when its long, non-connectable run fits the space.”
Brightown 100 ft Solar String Lights with 31+2 Shatterproof LED Bulbs
This set makes sense when we want a long outdoor run but do not need the 108-foot model’s extra reach or higher stated runtime. At 100 feet with 31 bulbs, it has wider spacing between lights than the 108-foot Brightown, so the effect is less densely populated along the cord. That can suit a fence or perimeter where evenly spaced points of light are enough; buyers wanting more bulbs across a similar span may prefer the top-ranked set.The core conveniences are still here: solar and USB-C charging, remote control, four brightness settings, three lighting modes, and timers. Its warm 2700K color temperature gives a clear reference for shoppers choosing a cozy-looking glow. The IP65 rating matches the 108-foot option, and the stated wind resistance is up to 50 MPH. A runtime of up to 26 hours is useful for longer evenings, though it trails the 108-foot model’s up-to-36+ hours.Charging is the compromise to weigh. Solar charging is listed at 7–8 hours, and the built-in light sensor may mean covering the panel if daytime operation is needed. USB-C charging is listed at four hours, which offers an alternative but still requires planning. As with the longer Brightown, this strand cannot be extended by connecting another set according to the supplied product information. Compared with Brightech, it is far longer and much more adjustable; compared with the 108-foot Brightown, it gives up some reach and runtime for a slightly shorter setup.
Pros:
- 100-foot length covers broad outdoor areas
- Solar and USB-C charging offer flexibility
- Remote includes four brightness settings, three modes, and timers
- IP65 protection, shatterproof bulbs, and stated wind resistance up to 50 MPH
Cons:
- Solar charging is listed at 7–8 hours
- Light sensor may require covering the panel for daytime use
- Fewer bulbs than the 108-foot Brightown despite a similar overall length
Best for: Buyers who want near-100-foot coverage, remote-operated settings, and USB-C backup without choosing the longest model.
Not ideal for: Shoppers who need the longest stated runtime, denser bulb spacing, or solar charging without planning around a long collection period.
Bottom line: We would choose this when we want a long, controllable strand but do not need the 108-foot model’s extra coverage and runtime.
“We would choose this when we want a long, controllable strand but do not need the 108-foot model’s extra coverage and runtime.”
Brightech Ambience Pro Solar-Powered Outdoor String Lights, 27 ft, 12 Shatterproof LED Bulbs
Brightech takes a different approach from both Brightown sets: it covers 27 feet with 12 S14 bulbs, rather than stretching across a yard with dozens of lights. That makes it the most sensible choice for a compact patio, balcony, or a short run above a table. It is also the only pick here with a clearly stated two-year limited warranty, a useful point of distinction for buyers who value warranty coverage.The detachable solar panel can be positioned using its stake or clip, giving us some choice about where it collects sun without requiring the lights themselves to sit beside the panel. Its 3000K soft-white light is warmer than a neutral utility glow, and the shatterproof bulbs are suited to outdoor spaces where fragile glass is inconvenient. Compared with the Brightown products, installation is less feature-heavy: the supplied details do not list USB-C charging, a remote, dimming levels, a timer, or multiple lighting modes.The biggest limitation is how long it can illuminate an evening. A full charge provides about 5–6 hours of light, the shortest stated runtime in this comparison, and the IPX4 rating is lower than Brightown’s IP65. It also needs direct sunlight for best charging results. We would favor it over either Brightown for a small, straightforward setup where 27 feet is enough; for all-evening use, broader coverage, or charging backup, the Brightown options are stronger fits.
Pros:
- Compact 27-foot run suits smaller outdoor spaces
- Detachable solar panel includes a stake and clip for placement
- Shatterproof S14 bulbs give a soft-white 3000K glow
- Includes a two-year limited warranty
Cons:
- Stated runtime is about 5–6 hours per full charge
- Solar-only charging depends on direct sunlight for best results
- IPX4 rating is lower than the Brightown models’ IP65 rating
Best for: Buyers with a small patio, balcony, or seating nook who want a compact solar-only strand and a detachable panel.
Not ideal for: Anyone lighting a large area, needing USB-C backup or remote controls, or expecting more than about 5–6 hours from a full charge.
Bottom line: We recommend this compact set when a short solar-only run is more useful than long coverage, extended runtime, or advanced controls.
“We recommend this compact set when a short solar-only run is more useful than long coverage, extended runtime, or advanced controls.”
As an Amazon Associate we earn from qualifying purchases.
Before You Start
Choose a clear route before opening or hanging the lights. Keep the panel lead within reach of the planned panel location, and keep the lights away from places where people can snag them, vehicles can strike them, or branches can rub them. A solar panel needs direct sunlight for a useful part of the day; shade from a roof, tree, wall, or neighboring building can reduce runtime. If the kit has a battery pull tab or a protective film over the panel, remove it according to the instructions. Charge the unit as directed before judging its nighttime performance.
Step-by-Step Instructions
Step 1: Check the kit and plan the route
Unpack the string, panel, mounting parts, and instructions. Lay the lights out on the ground without pulling them tight, and check for damaged bulbs, frayed wire, cracked parts, or missing hardware. Measure the distance along the route, including gentle curves and drops. Compare that measurement with the usable string length and panel lead length. Mark where each support will go, placing supports near ends and at intervals that prevent excessive sag. Plan the route so the cable does not cross a walkway at head or foot level.
Tip:Do not use a damaged set outdoors. Contact the seller or manufacturer for replacement parts instead of taping over damaged insulation.
Check: The full route fits within the light string’s length, the panel can reach its planned location, and every support point is identified.
Step 2: Choose a sunny location for the panel
Look for an outdoor spot that receives direct sun for several hours during the day and is not shaded by seasonal foliage or nearby structures. Check the location at different times, not just when you first inspect it. Keep the panel where it can be angled toward the sun as the manufacturer recommends, and position it so rainwater can drain rather than collect. If the kit uses a stake, choose firm soil; if it uses a bracket, select a sound mounting surface.
Tip:The lights can hang in a shaded area if the panel lead reaches a sunnier location. Do not extend the lead with an unapproved cable; added length can reduce performance or create a weather-exposure problem.
Check: The panel has a clear path to sunlight for much of the day and can be secured without blocking drainage or access.
Step 3: Install the mounting supports
Fit outdoor-rated hooks, screw eyes, clips, or a manufacturer-approved support wire at the marked points. For wood, use suitable pilot holes and fasteners; for masonry, use hardware designed for that material. Tighten each support so it cannot pull free under the string’s weight or ordinary wind movement. If attaching to a fence, railing, or building, avoid thin trim, loose boards, gutters, and other parts not designed to carry a load. Follow the fixture instructions where they differ from general guidance.
Tip:For long spans or heavier strings, use a separate outdoor-rated support wire and attach the light string to it with suitable clips. This reduces strain on the light cable. Do not overtighten or kink the wire.
Check: Each support is firmly attached, and the planned route has no sharp edges that could cut or pinch the cable.
Step 4: Mount and position the solar panel
Attach the panel to its bracket or stake using the supplied fittings. Secure a wall-mounted bracket to a solid surface, or push a ground stake into firm soil without forcing it against stones or roots. Aim and tilt the panel according to the instructions, then tighten the angle adjustment enough to hold its position. Keep the panel clear of puddles, sprinklers, and places where lawn equipment could hit it. Leave access to the switch and charging port if the unit has them.
Tip:Do not place the panel behind glass or under a clear cover unless the manufacturer specifically approves it; glazing can reduce the sunlight reaching the cells.
Check: The panel is stable, exposed to direct sunlight, and positioned so you can reach its controls for testing or seasonal adjustment.
Step 5: Hang the light string without pulling it tight
Starting at the end nearest the panel, hang the string from the supports and work along the planned route. Use the built-in hanging loops or suitable clips rather than piercing or crushing the cable. Leave a small, even curve between supports so wind movement does not pull hard on a socket or connection. Keep bulbs facing the intended direction and away from contact with leaves, fabric, or other materials. Avoid placing the string where doors, gates, or moving equipment can catch it.
Tip:Do not pull the string taut to remove every curve. Wind, temperature changes, and the string’s own weight can strain tight spans and loosen the supports.
Check: The lights follow the route evenly, the cable is not pinched or stretched, and no section creates a snag or trip hazard.
Step 6: Connect the panel and set the controls
Connect the light string to the panel or battery unit using the supplied connector. Align the connector marks and tighten or latch it as directed; do not force mismatched parts. Make sure any weather seal is seated, and keep the connection facing down or sheltered as the instructions specify. Turn on the unit or select the desired mode. If it has a separate switch, confirm it is in the operating position; many solar sets will not illuminate during daylight because the panel detects light.
Tip:Some models require a brief cover over the panel or a test button press to check the bulbs in daylight. Follow the product instructions rather than assuming the set is faulty.
Check: The connector is secure, the switch and mode are set, and the wiring has no exposed or strained connection.
Step 7: Charge the lights and test them after dark
Leave the panel in direct sun for the charging period stated by the manufacturer. If no charging time is listed, allow a full sunny day before evaluating the result. After dark, check whether the lights turn on automatically or respond to the control as expected. Inspect the string from end to end for bulbs that are loose or unlit, and confirm that the panel and connectors remain secure. If the first night is cloudy or the panel was shaded, repeat the test after a brighter day before changing the installation.
Tip:Runtime varies with panel exposure, season, weather, battery condition, and selected brightness or mode. A short first-night run does not by itself show that the set is defective.
Check: The lights illuminate after charging, remain lit for a useful period for your needs, and switch on or off according to the product’s controls.
Common Mistakes to Avoid
- Mounting the panel in a spot that is shaded for much of the day. — Check sunlight at several times of day and use the supplied lead to place the panel in a sunnier spot than the lights if needed.
- Pulling the string tight between supports. — Leave a gentle, consistent curve and add support points or a support wire for long spans.
- Using indoor hooks, unsuitable screws, or weak trim as mounting points. — Choose outdoor-rated hardware matched to the mounting surface, and attach it to a sound structural area.
- Deciding the lights are faulty before the battery has charged. — Follow the charging directions and test after a clear, full day of sunlight before troubleshooting the equipment.
Troubleshooting
Problem: The lights do not turn on after sunset.
Solution:
Check that the switch is on, the connector is fully seated, and any battery tab or protective film has been removed. Confirm that the panel had direct sun during the day, then charge it for the manufacturer’s stated period and test again. Use the manual’s test procedure if the set has one.
Problem: The lights turn on but go out sooner than expected.
Solution:
Move the panel away from shade, clean dirt from its surface with a soft damp cloth, and check that its angle faces the sun as directed. Try a lower brightness or a different mode if the unit offers one. Remember that short winter days and cloudy weather can limit charging.
Problem: Only some bulbs light up or the string flickers.
Solution:
Turn the unit off, inspect the string and connectors for looseness, moisture, or visible damage, and reseat only connections the instructions identify as user-serviceable. Replace a bulb only with a compatible part if the product allows it. Stop using the set if the cable is cut, exposed, or damaged.
Problem: The string sags, a support comes loose, or wind moves the lights excessively.
Solution:
Turn the lights off before working on them. Add or reposition supports, reinforce the mounting point with appropriate hardware, or install a suitable support wire. Do not solve sag by pulling the cable tighter; check for abrasion or damage before rehanging.
What Success Looks Like
The panel is firmly mounted in a sunny, accessible location; the string follows the planned route without tight tension, sharp bends, or hazards; all connectors and supports are secure; and the lights turn on after charging and operate as expected after dark. Check again after the first windy day or heavy rain for loose supports, shifted panel position, or cable wear.
Next Steps
Clean the panel when dust, pollen, or leaves collect on it, and check the mounting points and cable periodically. Reposition the panel if seasonal shade reduces its sun exposure. Before storms or winter storage, follow the manufacturer’s care instructions; remove or secure the set if strong winds, snow, or ice could damage it. Replace batteries only with the specified type, and stop using the unit if water enters a connection or the cable shows damage.
Frequently Asked Questions
How much sunlight do solar-powered string lights need?
Use the charging time specified by the manufacturer. Many sets perform best after several hours of direct sun, but cloudy weather, shade, and winter daylight can reduce runtime. Place the panel where it gets the clearest sun available.
Can I hang the lights in shade and put the panel in the sun?
Yes, if the supplied panel lead reaches a sunny, secure location. Keep the connection within the product’s rated setup and do not add an unapproved extension.
Why do the lights stay off during the day?
Many models use the panel’s light sensor to switch the bulbs off in daylight and on after dark. Use the manual’s test mode or button if you want to check the lights before sunset.
Can I leave solar string lights outside all year?
Only if the product is rated for outdoor use and the manufacturer allows year-round exposure. Weather ratings do not mean the set can tolerate every condition; secure or store it when wind, ice, snow, or flooding could cause damage.
What should I do if the lights work but do not last through the evening?
Check for panel shade or dirt, give the battery a full sunny charge, and try a lower-power setting if available. If runtime remains poor after several sunny days, check the product instructions for battery replacement or contact the manufacturer.
Fall Picks
fall essentials
As an affiliate, we earn on qualifying purchases.