This checklist is for homeowners planning a solar installation who want to understand the hardware, connection points, and safety components involved before choosing products. It covers several distinct parts of a system, so verify each item’s actual purpose rather than assuming a product belongs in a category based on its name alone.

Get backup power and energy gear delivered free with Prime
- Fast, free delivery on millions of items
- Prime Video, Amazon Music and more included
- Member-only deals all year
The sections follow the listed components and picks: mounting rails, roof flashing, cable connectors, DC disconnects, junction boxes, and grounding clips. Some slots have no product pick and focus on selection guidance; others include a named pick that should be checked carefully for compatibility and intended use.
Use this as a planning aid, not a substitute for system design or installation instructions. Confirm requirements with your solar equipment documentation and local qualified professionals, especially for roof penetrations and electrical safety. Before ordering, compare the product’s specifications with your panel and system details.
Solar Panel Mounting Rails
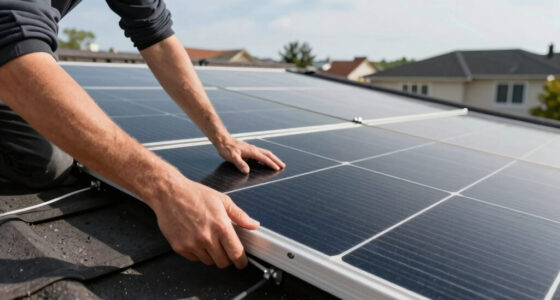
Mounting rails provide the structural path between compatible roof attachments and solar panels. Choosing rails is not just a matter of matching a panel count: the roof type, attachment spacing, panel dimensions, layout, and system design all affect what hardware is appropriate. The listed pick is the Tandefio Solar Panel Mounting Kit for 12-15 Solar Panels, Silver. Its product name identifies a stated panel range, but that alone does not establish compatibility with a particular roof, module, or installation plan.
A common buying mistake is treating a kit’s panel count as proof that every listed component will suit the project. Check what the kit includes, what panel frames it accepts, and whether the rail lengths and attachment approach fit the planned array. Confirm the installation instructions and load requirements with the project designer or installer; do not infer structural suitability from the product title. Also verify that the kit’s parts work together rather than assuming rails, clamps, and roof attachments are interchangeable across systems.
What to look for:
- Confirm the kit’s stated panel range against the planned array.
- Check compatibility with the specific panel frame and dimensions.
- Verify included rails, clamps, fasteners, and roof-attachment components.
- Match the attachment approach to the roof type and installation plan.
- Have structural requirements and layout reviewed by a qualified professional.
Tandefio Solar Panel Mounting Kit for 12-15 Solar Panels, Silver

This solar panel mounting kit includes all necessary components to securely install 12 to 15 solar panels, featuring durable aluminum alloy construction for weather resistance. The adjustable brackets and clamps allow versatile setup on various surfaces, making installation straightforward and adaptable for different solar panel sizes and locations.
Pros:
- Durable weather-resistant aluminum alloy construction
- Adjustable clamps for versatile installation
- Suitable for various surfaces and panel sizes
- Easy to install and operate
Cons:
- Limited to specific panel widths (26-42 inches)
- No detailed installation instructions included
- May require additional tools for assembly
Best for: Projects whose panel count and mounting requirements match the kit documentation
Not ideal for: Installations where roof, panel, or attachment compatibility is unverified
Bottom line: Treat the stated panel range as a starting point and confirm every mounting interface before purchase.
Roof Flashing Kits
Roof flashing helps manage the area where a mounting attachment passes through a roof surface. Because this detail affects both the mounting connection and the roof assembly, flashing should be selected for the specific roof material and attachment, not as a generic accessory. This checklist provides advice only and names no product pick for this slot.
A frequent mistake is choosing flashing by appearance or assuming one kit fits every roof. Check the roof covering, attachment design, installation method, and the manufacturer’s instructions for the mounting hardware. The right fit depends on how those components meet at the roof, so confirm the complete assembly with the installer or relevant product documentation. Avoid improvising around an opening or relying on a product description that does not clearly address your roof and attachment combination; roof-system compatibility matters.
What to look for:
- Identify the roof covering and attachment type before selecting flashing.
- Confirm the flashing is specified for that exact roof-and-mount combination.
- Review installation instructions for placement and sealing details.
- Check that the chosen attachment and flashing are designed to work together.
- Ask a qualified installer to assess roof penetrations and project-specific requirements.
Solar Cable Connectors
Cable connectors join compatible conductors within a solar setup, so their electrical and physical specifications need to match the equipment and wiring plan. The listed pick is the SolarTred 20,000mAh Solar Power Bank with 4 Solar Panels, 3 Built-In C. The product name describes a power bank, not a solar cable connector, so it should not be treated as a connector pick without documentation confirming the intended component and use.
A common mistake is buying a product because its name includes “solar” and assuming it belongs in a rooftop system. Instead, identify the connector type required by the panels and other equipment, then verify conductor compatibility, polarity, environmental suitability, and the manufacturer’s installation guidance. Do not assume that a portable power-bank product provides connectors for a home array. If the product description does not clearly identify the connector and its specifications, leave it out of the system design and ask the installer to specify the correct part.
What to look for:
- Confirm the product is a cable connector intended for the system component.
- Match connector type and conductor size to the equipment documentation.
- Check polarity and the required connection method.
- Verify suitability for the installation environment and wiring plan.
- Do not substitute a portable power bank for a specified system connector.
SolarTred 20,000mAh Solar Power Bank with 4 Solar Panels, 3 Built-In Cables, Fla

This 20,000mAh lithium-polymer power bank has four integrated solar panels and supports charging up to five devices at once through its built-in cables and ports. It also includes a dual flashlight with steady, SOS, and strobe modes, plus a camping light with three brightness levels; the two lights cannot operate simultaneously.
Pros:
- Large 20,000mAh capacity and charging support for up to five devices.
- Four integrated solar panels provide an additional charging option.
- Includes built-in cables, a multi-mode flashlight, and an adjustable camping light.
- IP67-rated construction and electrical safety protections.
Cons:
- The flashlight and camping light cannot be used at the same time.
- Solar charging performance depends on available sunlight.
Best for: Shoppers using the product name as a prompt to verify the category
Not ideal for: Anyone seeking a confirmed rooftop solar cable connector from this pick
Bottom line: The named product is a power bank, so verify its purpose before considering it for a connector slot.
DC Disconnect Switches
A DC disconnect is a system component that must be selected and placed according to the equipment design and applicable installation requirements. This slot has no product pick, so focus on confirming the required disconnect with the system designer or qualified installer. The appropriate device depends on the specific electrical design rather than a general “solar” label.
A common mistake is choosing a switch based only on appearance or assuming any DC-rated device will suit the installation. Check the system documentation for the required ratings, configuration, location, and compatibility with connected equipment. Confirm that the selected disconnect is intended for the relevant application and that its installation follows the manufacturer’s instructions and local requirements. Because this is an electrical safety component, do not guess at specifications or substitute an unrelated switch.
What to look for:
- Obtain the required disconnect specifications from the system design.
- Verify ratings and configuration against the connected equipment.
- Confirm the intended location and installation method.
- Review manufacturer instructions and applicable local requirements.
- Have selection and installation checked by a qualified professional.
Solar Panel Junction Boxes
A junction box provides a defined place for compatible electrical connections, but the correct choice depends on the equipment and wiring arrangement. No product is listed for this section. Start by checking whether the planned system calls for a separate junction box and what specifications the equipment documentation sets out. Do not assume one is interchangeable with a connector, enclosure, or other electrical component.
A common buying mistake is focusing on the box’s size while overlooking its intended application, connection arrangement, environmental suitability, and compatibility with the wiring plan. Confirm how conductors enter and leave the enclosure, what components it must accommodate, and whether the system documentation identifies a specific type. Installation details should follow the product instructions and applicable requirements. If the system design does not clearly define the part, ask the installer to specify it before ordering; the wiring plan should lead.
What to look for:
- Confirm whether the system design calls for a separate junction box.
- Match the box and connections to the documented wiring arrangement.
- Check conductor entry, exit, and space requirements for the planned components.
- Verify suitability for the intended installation location.
- Follow the manufacturer’s instructions and get professional clarification when needed.
Grounding Clips
Grounding clips are electrical bonding components, so the correct part must match the mounting hardware and the equipment’s grounding design. The listed pick is the Solar Bug Zapper Outdoor, 3-in-1 Solar Mosquito Zapper with Flame, Pro. Its name describes an outdoor mosquito zapper rather than a grounding clip, so it is not a clearly suitable pick for this slot.
A common buying mistake is assuming that a product with “solar” in its name can serve as solar-installation hardware. For grounding and bonding parts, verify the exact component, the mounting system it is designed to work with, and the grounding instructions for the panels and rails. Do not substitute a consumer outdoor device for a specified electrical component. If a grounding clip is needed, have the installer identify a compatible part and confirm its installation method; bonding compatibility is essential.
What to look for:
- Confirm the product is specifically identified as a grounding or bonding clip.
- Match the clip to the rail and panel-frame system.
- Check compatibility with the installation’s grounding design.
- Follow the mounting-system and equipment instructions.
- Do not use the named mosquito zapper as a grounding component.
Solar Bug Zapper Outdoor, 3-in-1 Solar Mosquito Zapper with Flame, Projection Mo

The Zwiran solar bug zapper covers up to 2100 sq ft and uses a 4200V electric grid to eliminate mosquitoes, flies, moths and other insects. It features an auto light sensor, 10 lighting modes with a realistic flame effect, IPX5 waterproof protection, and up to 10 hours of operation on a built‑in 3000 mAh battery with Type‑C fast charging.
Pros:
- High‑voltage 4200V grid quickly kills a wide range of flying insects.
- Solar powered with a large battery provides up to 10 hours of night operation.
- Multiple lighting modes add ambiance and include a realistic flame effect.
- IPX5 waterproof design withstands rain and outdoor conditions.
Cons:
- Runtime limited to about 10 hours; may need recharging on cloudy days.
- Performance depends on sufficient sunlight for charging.
- May be bulky to install in smaller patio spaces.
Best for: Shoppers checking that grounding hardware matches its stated purpose
Not ideal for: Anyone looking to use an outdoor mosquito zapper as electrical hardware
Bottom line: The listed pick is a mosquito zapper, so source a grounding clip specified for the mounting system.
Buy in a practical order: first confirm the system design, roof type, panel details, and installation requirements; then select compatible mounting and roof-attachment hardware. Next, have the installer specify electrical connections, disconnects, junction boxes, and grounding parts. This keeps compatibility ahead of convenience and helps avoid ordering products that do not match their stated role.
Use the named picks as prompts to inspect product descriptions rather than as automatic recommendations, especially where the product name points to a different category. When specifications are unclear, pause and ask a qualified professional. A careful checklist and clear equipment documentation make it easier to move forward confidently.