
TL;DR
Moving your rig into a closet or enclosed space can drastically reduce noise and reflections. Focus on strategic placement, proper ventilation, and targeted acoustic treatment for the best results. Foam alone is rarely enough; controlling reflections and heat is key.
Imagine turning a tiny closet into your personal recording studio or quiet gaming haven. It sounds simple, but the truth is, small spaces pack a punch — both in sound and heat. The secret isn’t just about slapping foam on the walls; it’s about smart placement, managing heat, and understanding what soundproofing really does.
This isn’t just about making your space quieter — it’s about making it sound better, with less echo and more clarity. Whether you’re recording vocals, streaming, or just trying to keep your noise from bothering neighbors, the key lies in how you treat that small, often overlooked spot: the closet.
Acoustic dampening
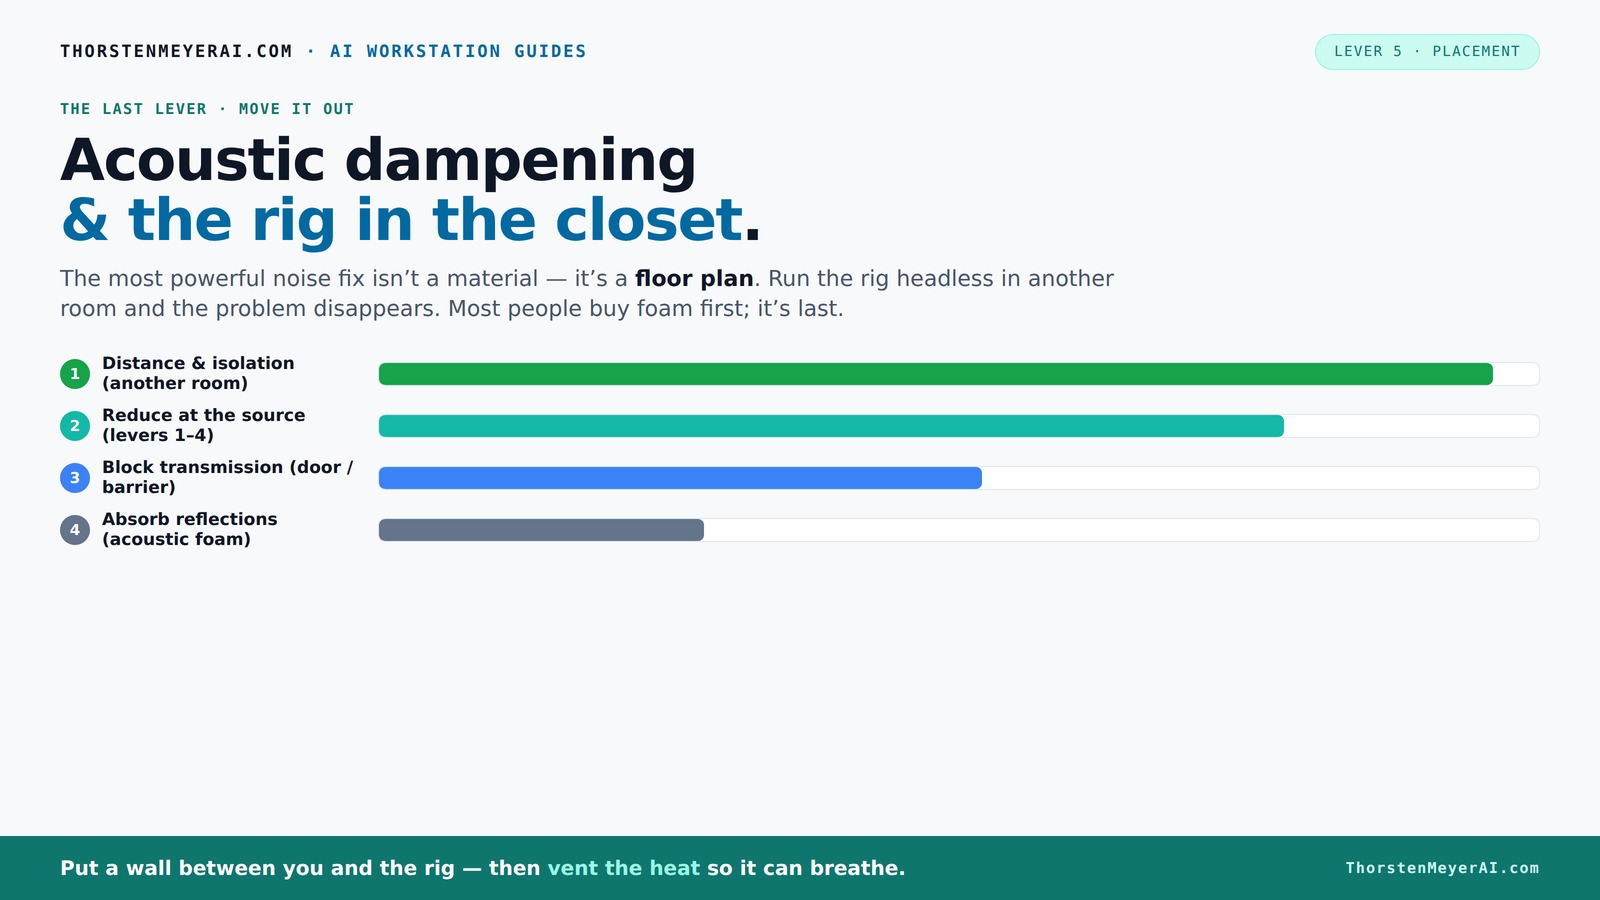
& the rig in the closet.
The most powerful noise fix isn’t a material — it’s a floor plan. A rig you can’t hear because it’s in another room beats any amount of foam. Tap the approaches in Part 1 to see what actually works.
(another room)
(levers 1–4)
(door / barrier)
(acoustic foam)
Contain the noise, not the heat
Key Takeaways
- Strategic placement of absorption materials at reflection points dramatically improves sound clarity in small spaces.
- Controlling heat with proper ventilation is non-negotiable when placing a rig in an enclosed closet.
- Moving your rig into a different room or closet often beats expensive soundproofing products—distance is your best friend.
- Foam absorbs reflections but doesn’t block sound; sealing gaps and using barriers are essential for soundproofing.
- A well-ventilated, soft-lined closet can house a powerful, quiet rig for voiceover, streaming, or AI workloads.

Focusound 52 Pack Acoustic Foam Panels 1" x 12" x 12" Sound Proof Foam Panles Soundproofing Noise Cancelling Wedge Panels for Home Office Recoding Studio with 300PCS Double-Side Adhesive
Soundproofing - Acoustic foam panels triangular grooves structure for better noise absorption, helps to reduce and absorb unwanted...
As an affiliate, we earn on qualifying purchases.
As an affiliate, we earn on qualifying purchases.
Why Your Closet Can Make or Break Your Sound Quality
Clothing, drywall, and tight corners turn a closet into a mini echo chamber if you’re not careful. The confined space enhances reflections and low-end buildup, which can make your recordings sound boomy or muddy. But when managed well, it’s a perfect spot for a DIY vocal booth.
Consider a creator who converted a closet into a voiceover studio. They added thick blankets, sealed gaps, and positioned the mic carefully. The result? Clear, dry vocals in a space that once sounded like a cave.
Here’s the key: your closet’s shape and contents matter. Parallel walls, open doors, and bare surfaces are the enemy. Covering these with soft, absorbent materials reduces reflections and improves clarity.
Understanding how the geometry of your closet influences sound is crucial. Parallel surfaces can cause standing waves and flutter echoes, which muddle your recordings. Non-parallel surfaces or irregular shapes help diffuse sound, reducing problematic reflections. Therefore, treating the right areas—especially the reflective surfaces—can dramatically improve clarity. For more on acoustic treatment, see this guide.

8 Pack - Bass Traps Acoustic Foam Corner, 8''x8''x12'' Black Bass Traps Corner Studio Foam, High Density and Fire-Proof Acoustic Panels Recording Studio Acoustical Treatments
Acoustic Principle- Bass Trap is a kind of sound absorbing structure specially used to absorb specific low-frequency standing...
As an affiliate, we earn on qualifying purchases.
As an affiliate, we earn on qualifying purchases.
Acoustic Dampening vs. Soundproofing: Know the Difference
Acoustic dampening and soundproofing often get mixed up, but they serve different purposes. Dampening materials like foam, blankets, and panels absorb sound reflections inside the space, reducing echo and reverberation. They don’t, however, block outside noise from entering or inside noise from escaping.
Soundproofing involves heavy, dense barriers — like drywall, mass-loaded vinyl, or sealed doors — that prevent sound from passing through walls or doors. It’s a much bigger, more expensive game.
For a closet setup, focus on dampening to control reflections and noise inside. Use soundproofing if outside noise leaks in or your noise escapes and bothers others. Combining both approaches can yield the best results, but it’s essential to understand their roles. For instance, if your primary concern is keeping your neighbor’s noise out, add mass and seals around the closet. If you want a clearer sound without echoes, prioritize internal dampening. The tradeoff is cost and complexity—dampening is simpler and cheaper, but less effective at blocking sound transmission. Properly applied, each method complements the other, creating a balanced environment for both sound quality and noise isolation.

Portable Recording Booth for Home Studio, Soundproof Vocal Booth with Travel Bag for Voiceovers, Podcasts, Streaming and Music Recording
【Superior Sound Isolation for Clean Takes】: Durable oxford fabric with multi-layer acoustic pads helps absorb up to 90%...
As an affiliate, we earn on qualifying purchases.
As an affiliate, we earn on qualifying purchases.
Where to Place Absorption Materials in Your Closet Booth
Strategic placement of acoustic treatment is everything. Start with the main reflection points: behind the microphone and the wall directly in front of it. For example, if you’re recording vocals, place a foam panel or blanket about 4-6 inches behind the mic to absorb the sound bouncing back from the wall.
Next, treat side walls and the ceiling at their reflection points. Use a mirror trick: sit in front of your mic and have a friend move a mirror along the walls. When you see the mic’s reflection, that’s where you need absorption. Addressing these points prevents flutter echoes and reduces muddiness in your recordings.
Low-end buildup is common in tiny closets. Place bass traps in corners where two walls meet, especially at the base of the closet. Covering the door gap with weatherstripping or a heavy blanket also prevents sound from leaking out or in. Proper placement ensures that your treatment directly targets the areas that cause the most reflections, which is essential for achieving clear, professional-quality recordings. The tradeoff involves balancing coverage—over-treating can make the space too dead, while under-treating leaves reflections unmanageable. Focus on the key reflection points to maximize effectiveness without sacrificing natural sound.

Amico 12" Smart Shutter Exhaust Fan with Thermostat & 8 Speed, 1282 CFM (Up To 1600 Sq.Ft), 25W Energy Saving Brushless DC Motor, Wall Mount Garage/Attic/Greenhouse Vent Fan, Plug & Play, FCC
【Massive 1282 CFM Airflow & Wide Coverage】Dominate the heat with a powerful 1282 CFM airflow capability. Driven by...
As an affiliate, we earn on qualifying purchases.
As an affiliate, we earn on qualifying purchases.
How to Ventilate a Closet Rig Without Losing Silence
Ventilation is the Achilles’ heel of closet rigs. Without airflow, heat builds up fast — leading to throttled hardware and noisy fans. The trick is to ventilate smartly without letting sound escape.
Start with passive vents or small intake/outlet holes sealed with acoustic gaskets. Add a quiet exhaust fan that’s designed for soundproof environments. These fans can pull hot air out while keeping noise levels below 30 dB. Proper placement of vents ensures airflow without creating sound leaks, which can compromise your quiet environment.
Some creators use ducting and inline fans to direct heat outside the closet, maintaining both silence and cooling. Remember, a sealed space traps heat, so ventilation isn’t optional — it’s mandatory if you want your rig to run smoothly. The tradeoff is that inadequate ventilation leads to overheating, which can reduce hardware lifespan or cause thermal throttling. Using well-designed, low-noise fans and strategically placed vents balances heat dissipation with sound containment, ensuring your setup remains both cool and quiet.
For more detailed cooling strategies, check out this guide on [reducing heat and noise in a high-power AI workstation](https://thorstenmeyerai.com/reduce-heat-noise-ai-workstation/).
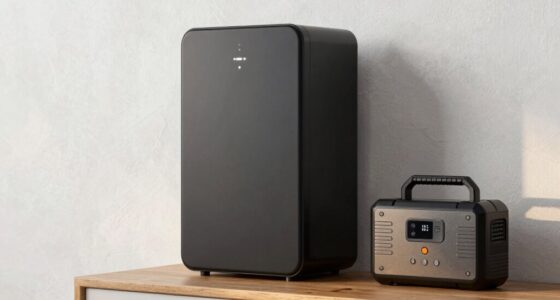
Using the 'Rig in the Closet' Setup for Quiet, Powerful Work
The 'rig in the closet' approach is a game-changer for noise-sensitive environments. It allows you to house a powerful, heat-generating machine in a sealed, soft-lined space, keeping noise levels near zero at your desk.
For example, a streamer might put their gaming PC in a closet with blankets and acoustic panels, then run ducted airflow with a quiet fan. They connect remotely via Ethernet or Wi-Fi, so the noise never reaches their workspace. The key is ensuring the airflow is sufficient to prevent overheating while maintaining a sealed environment to contain noise.
This setup isn’t just for gaming — it’s perfect for voice recordings, streaming, or AI work, where heat and noise are a concern. The tradeoff involves careful planning of ventilation and insulation to prevent heat buildup without sacrificing soundproofing. Professional soundproof cabinets exist for this purpose, but a DIY version with blankets, weatherstripping, and a small exhaust fan can work wonders. The advantage is a nearly silent, high-performance space that keeps noise away from your microphone and ears while managing heat effectively.
Common Mistakes to Avoid When Using a Closet as a Studio
One common mistake is sealing the closet completely without providing airflow. This traps heat and can damage your hardware. Always include ventilation, even if it’s just passive vents or a low-noise fan.
Another pitfall is neglecting reflection points. Cover only the corners and the largest surfaces, not every inch — over-treating wastes money and space. Over-treating can also deaden the natural sound, making recordings sound unnatural or overly muffled. Focus on the primary reflection zones for an effective and balanced treatment.
Using foam panels as a full-room solution is a mistake. Foam is great for reflections but doesn’t block sound transmission. Seal gaps around doors and vents to prevent sound leaks. Otherwise, noise can escape or enter, defeating the purpose of your setup. Lastly, ignore the placement of your microphone. Keep it at least a few inches from reflective surfaces and test different positions to find the clearest, most natural sound. Proper placement and treatment are crucial for achieving professional results without wasting resources or creating an unbalanced acoustic environment.
Frequently Asked Questions
Is acoustic dampening the same as soundproofing?
No, acoustic dampening absorbs reflections inside a space, reducing echo and reverb. Soundproofing involves barriers that block sound from passing through walls or doors, preventing noise from escaping or entering.Where should I place foam or panels in my closet booth?
Place panels at primary reflection points: behind the microphone, on side walls, and the ceiling. Use the mirror trick to identify these spots and treat corners with bass traps if low-end buildup occurs.Do I need to cover every wall?
Not necessarily. Focus on the main reflection points and corners. Covering the entire space isn’t cost-effective and can deaden the sound too much. Prioritize areas that cause echo or muddiness.How thick should panels or blankets be?
Aim for 2-4 inches of dense material like foam or mineral wool. Thicker treatments absorb more low frequencies, but even thinner blankets can make a noticeable difference in small spaces.Should I treat the closet corners?
Absolutely. Corners accumulate bass frequencies, causing low-end buildup. Use bass traps or foam wedges in the corners to tame this issue effectively.Conclusion
Turning a closet into a mini studio or quiet rig space is all about smart placement, effective dampening, and proper ventilation. Focus on where sound bounces and how heat escapes — these are your biggest wins.
Remember, the most effective soundproofing is often simply moving your gear away from your ears. Think beyond foam and embrace the power of space — your workspace and your hardware will thank you.