TL;DR

Get backup power and energy gear delivered free with Prime
- Fast, free delivery on millions of items
- Prime Video, Amazon Music and more included
- Member-only deals all year
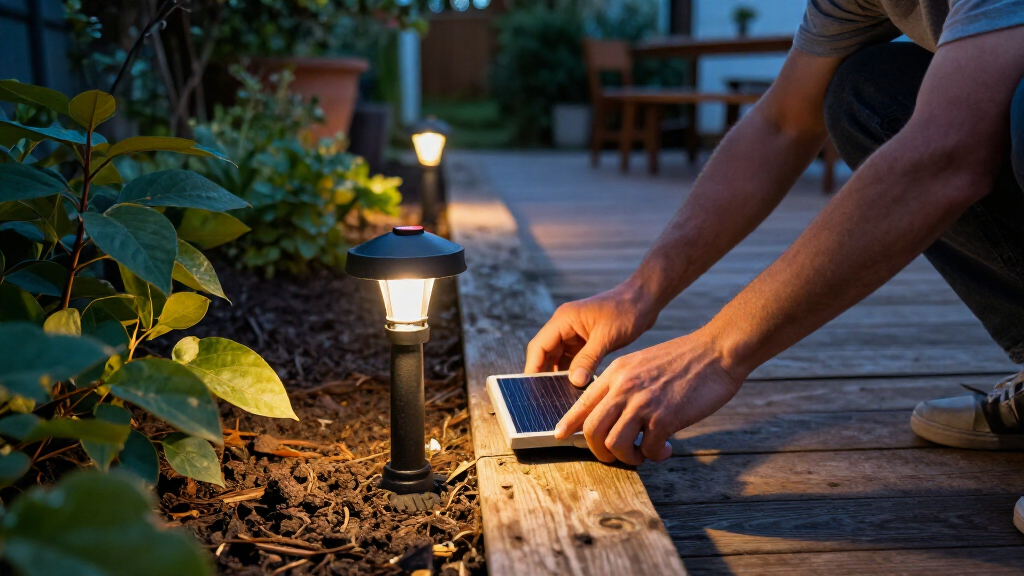
A Hunker report describes a DIY method from the YouTube channel Glue Guns & Roses: fit a solar light over a painted wooden dowel to raise it above the ground. The source estimates the materials at less than $5 per light, but does not provide independent testing of durability or lighting performance.
Hunker has reported on a DIY method from the YouTube channel Glue Guns & Roses that raises Dollar Tree outdoor solar lights by fitting them over painted wooden dowels. The project is presented as a low-cost way to change the lights’ height and appearance, with materials estimated at less than $5 per light.
The method calls for one wooden dowel per light, with a diameter narrow enough to fit inside the light’s stake, plus spray paint. Hunker lists Dollar Tree solar lights at about $1.50 each and gives a wooden dowel price of $0.78 as an example. Prices can vary, and the report does not establish that those figures apply at every store or date.
For the basic version, the report recommends painting the dowel black to match traditional light stakes. It says to use outdoor spray paint that can protect the wood from rain and humidity, and to allow the paint to dry for at least 20 minutes before installation. The light’s open bottom then fits over the dowel; the instructions say no adhesive is needed if the parts fit securely.
To install, the dowel is pushed into the ground, with at least one-third below the surface for stability. Hunker advises wetting hard ground to soften it. The source also describes painting dowels in brighter colors or adding an inverted stemless glass as decorative alternatives, based on projects by Glue Guns & Roses.
A Low-Cost Way to Raise Path Lights
The project offers homeowners a way to alter the height and arrangement of inexpensive solar lights without buying taller fixtures. Hunker suggests placing them in groups, around a yard, or along a walkway, where they can be spaced about 6 to 8 feet apart. That spacing is a styling suggestion from the report, not a tested standard for how much light a path needs.
The idea may appeal to people who already own stake lights and want to reuse them, or who prefer a coordinated look across a garden. The low stated cost makes experimenting with several lights more affordable than purchasing some purpose-made landscape fixtures. However, the source does not compare the result with commercial lighting or report measured brightness, weather resistance, or long-term performance.
Products Worth Considering

Autel MaxiCharger Level 2 EV Charger, 40A, 240V, Indoor/Outdoor, 25‑Foot Flexible Cable, NEMA 14‑50 Plug (White)

DEWALT 20V MAX XR Impact Driver, 1/4 Inch High Torque Brushless 3-Speed Cordless with LED Light, Extended Runtime (DCF845B)

DEWALT 20V MAX 1/4-Inch Impact Driver Kit with Battery and Charger (DCF787D1)
As an affiliate, we earn on qualifying purchases.
How the Dowels Change the Setup
Standard stake-style solar lights sit close to the ground. In the method described by Hunker, the dowel acts as an extension: its lower end goes into the soil, while the solar light’s stake opening sits over the top. The report says the fit should hold the pieces together without glue, but the dimensions of individual lights and dowels may differ.
The basic design uses black paint to match traditional stakes, while other colors are offered as a decorative option. Glue Guns & Roses is also credited with placing upturned stemless glasses over lights for a different appearance. These are variations shown or described in the source, rather than products tested for safety or outdoor longevity.
“Each light costs less than $5 to make.”
— Hunker, describing the project
Fit, Weathering and Light Output
The report does not provide independent tests of the modified lights, including how long the dowels last outdoors, whether the fit stays secure in different soils, or whether extending the lights changes their illumination. It also does not specify a particular dowel length or diameter; compatibility depends on whether a dowel fits inside the opening of the chosen light.
The stated prices are examples rather than guaranteed current prices, and Dollar Tree styles may change. Hunker recommends outdoor spray paint, but does not document how well a particular coating protects wood over time. The source also offers no tested spacing plan for achieving a particular brightness or coverage level.
Check Materials Before Installing
Anyone trying the project will need to check the light’s stake opening against the dowel before painting, and confirm the chosen coating is labeled for outdoor use. Allow the paint to dry according to its label, then push the stake into soil that can hold it upright; soften compacted ground with water as the report suggests. Recheck the lights after installation for a loose fit or leaning dowel.
The next practical step is to compare available light and dowel prices locally, since the report’s cost estimate is not a current price guarantee. The source provides no announced follow-up testing or performance data, so the durability and illumination of the finished setup remain for users to evaluate in their own yards.
Key Questions
What materials does the Dollar Tree solar-light DIY require?
It requires one wooden dowel per light, a solar stake light and spray paint. The dowel must be narrow enough to fit inside the light’s stake opening. The source recommends outdoor paint for the exposed wood.
How much does the project cost?
Hunker estimates less than $5 per light, citing a solar light priced around $1.50 and an example dowel costing $0.78. Those are reported examples, not guaranteed current prices, and the estimate also depends on paint costs and how many dowels one can covers.
Does the wooden dowel need to be glued to the light?
The instructions say no adhesive is needed if the dowel fits snugly inside the solar light’s stake. The source does not give a universal size, so check the fit before installing; it does not explain how to secure parts that are loose.
How deep should the dowel go into the ground?
Hunker recommends placing at least one-third of the dowel below ground to help stabilize the light. It suggests wetting hard soil to make insertion easier. The finished light should be checked to confirm it stands securely.
Has the modified light’s durability been tested?
The source describes the DIY and recommends outdoor spray paint, but reports no independent durability or brightness testing. How the dowel and paint hold up will depend on materials, weather, soil and installation.
Source: hunker.com